Cavechat.org
The Official Caving Forum of the National Speleological Society
NSS Home Page |
Flickr NSS Photo Pool | Online Cavers Network
CaveChat Room |
NSS Bookstore | Find Local Caving Club
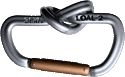
Figure 9
Moderator: Tim White
Figure 9
![]() by GypsumWolf » Apr 5, 2007 9:01 am
by GypsumWolf » Apr 5, 2007 9:01 am
-

GypsumWolf - NSS Hall Of Fame Poster
- Posts: 509
- Joined: Jan 24, 2006 9:02 am
- Location: TAG
![]() by Scott McCrea » Apr 5, 2007 10:18 am
by Scott McCrea » Apr 5, 2007 10:18 am
SWAYGO
-
Scott McCrea - Global Moderator
- Posts: 3198
- Joined: Sep 5, 2005 3:07 pm
- Location: Asheville, NC USA
- NSS #: 40839RL
- Primary Grotto Affiliation: Flittermouse Grotto
fig nin
![]() by GypsumWolf » Apr 5, 2007 10:29 am
by GypsumWolf » Apr 5, 2007 10:29 am
I think I will start using them.
-
GypsumWolf - NSS Hall Of Fame Poster
- Posts: 509
- Joined: Jan 24, 2006 9:02 am
- Location: TAG
Re: Figure 9
![]() by hank moon » Apr 5, 2007 10:55 am
by hank moon » Apr 5, 2007 10:55 am
WildWolf wrote:Since the Figure 9 knot is more efficient then why do most of us use a Figure 8 knot?
Since a sewn termination is MUCH more efficient (for IRT), why bother with knots at all?

hank
-

hank moon - NSS Hall Of Fame Poster
- Posts: 610
- Joined: Sep 7, 2005 9:52 am
- Location: Salt Lake City
![]() by LifeOnALine » Apr 5, 2007 12:37 pm
by LifeOnALine » Apr 5, 2007 12:37 pm
The biggest 'problem' with the F9 is that it's only good as an end loop knot. New cavers learning a family of knots (end loop, rethread,y-hang, directional, etc.) can probably recognize the F8 patterns easier and so spot mistakes. A F9 tends to look 'wrong' even when it's tied correctly!
and sure, a sewn eyelet is in theory 100%, but it don't help much if you want the knot 8 feet in from the end! I wouldn't be too happy on a pull-thru trip if each end of m'string had a fckn great bauble sewn on either....
-
LifeOnALine - Occasional Poster
- Posts: 30
- Joined: Mar 4, 2007 6:55 pm
Re: Figure 9
![]() by Stridergdm » Apr 5, 2007 11:11 pm
by Stridergdm » Apr 5, 2007 11:11 pm
WildWolf wrote:Since the Figure 9 knot is more efficient then why do most of us use a Figure 8 knot?
Define "effecient". Seriously, it's too open-ended of a term.
Once you can define that, you can better address you question.
Reminds me a of a recent right where I used a bowline and my fellow caver asked me why I didn't use a figure-8. Thought about it and realized, I didn't really have a good reason... and it didn't really matter.
But did make me think.
-

Stridergdm - NSS Hall Of Fame Poster
- Posts: 931
- Joined: Nov 1, 2005 10:08 am
- Location: Capital District NY and Northern Virginia
- Name: Greg Moore
- Primary Grotto Affiliation: RPI Grotto
Re: Figure 9
![]() by GypsumWolf » Apr 6, 2007 7:34 am
by GypsumWolf » Apr 6, 2007 7:34 am
Stridergdm wrote:WildWolf wrote:Since the Figure 9 knot is more efficient then why do most of us use a Figure 8 knot?
Define "effecient". Seriously, it's too open-ended of a term.
Once you can define that, you can better address you question.
Reminds me a of a recent right where I used a bowline and my fellow caver asked me why I didn't use a figure-8. Thought about it and realized, I didn't really have a good reason... and it didn't really matter.
But did make me think.
I already asked that question. I left it open ended because then people can tell me why they think it is more efficient (in what ways) when responding to the post.
-
GypsumWolf - NSS Hall Of Fame Poster
- Posts: 509
- Joined: Jan 24, 2006 9:02 am
- Location: TAG
![]() by ek » Apr 7, 2007 12:08 am
by ek » Apr 7, 2007 12:08 am
LifeOnALine wrote:Although a Figure-9 loop knot in the end of a rope, set and tightened correctly, is on average 10% stronger than a Figure-8 loop, in reality the strengths both vary by at least 10% each way, so there's only a benefit in terms of ease-to-untie
I disagree with this reasoning. Suppose that a figure nine is 70-80% efficient, and a figure eight is 60%-70% efficient. I don't know how efficient each is, so this is only a guess. Then when using a figure eight one should assume an efficiency of 60%, whereas when using a figure nine one should assume an efficiency of 70%. In other words, the figure nine still benefits from additional strength, as well as not jamming as tightly.
However, as mentioned, the figure nine is more complex to tie and recognize, and generally the 10% strength difference doesn't matter because a sufficient safety factor is used. Also, the figure nine takes more rope to tie. I typically only use it on thin rope or when I want a knot that I can untie quickly (for instance, I sometimes use an inline figure nine as an emergency footloop--it is rather easy to untie when weighted from above and from in the bight, though not when it is weighted from below as well).
LifeOnALine wrote:The biggest 'problem' with the F9 is that it's only good as an end loop knot.
I have used the figure nine on a bight as an endline loop and as a midline loop when it won't be weighted so that it will capsize or when it doesn't matter if it capsizes, and also I have used the double figure nine and the directional (inline) figure nine. I have made a figure nine on a bight by rethreading a figure nine tied on the line, and I have used a figure nine on a line as a light stopper knot. To the best of my knowledge, the figure nine can be used in all the forms that the figure eight can be used, though it is rather time consuming to tie a figure nine follow through or a figure nine bend. (Note that this is not the case for the overhand knot--the "directional overhand" is a midline slipknot--and, like the other directional knots in the figure-eight family, a constrictor if weighted in the "wrong" direction--and the overhand version of the double figure eight will hold if one of the two loops slips through, but will become a slipknot if the other slips through.)
LifeOnALine wrote:and sure, a sewn eyelet is in theory 100%, but it don't help much if you want the knot 8 feet in from the end! I wouldn't be too happy on a pull-thru trip if each end of m'string had a fckn great bauble sewn on either....
Sucks if you have to rig to two bolts one day, one the next, and three the day after.
Yes, knot-tying surely won't be eliminated any time soon.
NSS 57892
Syracuse University Outing Club
Fund vital White Nose Syndrome research--donate to the NSS and select the WNS Rapid Response Fund.
Facebook users can also donate here.
-

ek - NSS Hall Of Fame Poster
- Posts: 1040
- Joined: Apr 3, 2007 2:45 am
- Location: Syracuse, NY
- Name: Eliah Kagan
- NSS #: 57892
- Primary Grotto Affiliation: Syracuse University Outing Club
![]() by NZcaver » Apr 7, 2007 12:57 am
by NZcaver » Apr 7, 2007 12:57 am
ek wrote:The efficiency of a knot is a technical term that refers to the percentage of the original rope strength (i.e. the strength of a straight rope) that remains when the knot is tied in it.
Technically you're correct, but try to look at it this way. Just because a given knot has a higher strength efficiency, it may not necessarily be a more efficient knot overall when used in a particular application. I think this broader context of so-called "efficient use" is what WildWolf and StriderGDM were referring to, and your last post certainly explored this.
However, as mentioned, the figure nine is more complex to tie and recognize, and generally the 10% strength difference doesn't matter because a sufficient safety factor is used. Also, the figure nine takes more rope to tie. I typically only use it on thin rope or when I want a knot that I can untie quickly.

-

NZcaver - Global Moderator
- Posts: 6367
- Joined: Sep 7, 2005 2:05 am
- Location: Anchorage, Alaska
- Name: Jansen
- NSS #: 50665RL
![]() by LifeOnALine » Apr 7, 2007 3:45 am
by LifeOnALine » Apr 7, 2007 3:45 am
I agree that in a controlled tensile test the F9 is 10% stronger than the F8, but *only* in that configuration. The increased complexity of pinch points in a F9 means that in a drop test there's no clear winner, and a loosely-tied F9 can lose to a loosely-tied F8. I've drop-tested loads of rope with F8 one end and F9 the other, and gave up predicting the outcome years ago. Don't get me wrong, I like the F9 because it releases easier, but if it was that much better than the F8 nobody in industry rigging would still be using 8s.
The directional F9 and the 'Bunny-9' do exist, but both are significantly weaker than the equivalent in the F8 family, either in loop strength or through-line strength. F9s on the bight have a load of slippage as the knot is huge, and that makes the strength vary widely from day to day.
Everyone:
One thing it seems we're getting caught up in is the idea of 'strength' based on a number for tensile pulls - the '70% Figure 8' or the '50% overhand' are slow tests - unless you're lifting cattle, a sport caving knot will see the biggest force in a fall, which is a short-lived dynamic 'insult' instead of a pull. Knots all act differently when loaded this way, and the more complex knots show wider-spaced results. An overhand is pretty much 50% at any speed, but a F9 or F10 strength can change by a third if you load it at high speed as there's more frictional heating going on. To say a knot is 'strong' isn't all that useful unless you know what type of force you're going to put on it.
The way I see it, a knot is 'good' if it's strong enough for the job, easy enough to tie and release, and the knots that are stronger or easier are too complicated or need too much rope to bother with. If what we wanted was the absolute best strength and perfect ease of release we'd all be hanging ropes off 25ft dog-and-tails, but good 'enough' is what you get if you also want the trip to be practicable!
-
LifeOnALine - Occasional Poster
- Posts: 30
- Joined: Mar 4, 2007 6:55 pm
![]() by knudeNoggin » Apr 15, 2007 1:07 am
by knudeNoggin » Apr 15, 2007 1:07 am
The Fig.9 is less so than the Fig.8 in:
material;
tying (dressing & setting) time/effort--esp. "reweaving";
It is more so, perhaps, in strength--though it's really hard to get a good
reading as to what exact geometry in these traced knots is tested
--i.p., of the twin parts, which end is loaded?
It is more so in UNtying, generally.
NB: there is a symmetric Fig.9 (couple, actually).
There is also the Reverse Fig.9 (comes with the same question about
which end should be loaded (or does it matter)?).
10% stronger
One needs to be careful about what THIS means: I think in this case
it's maybe more true than is intended--i.e., that the intention is actually
"10 percentage points" and the reality is less than that, closer to
10% of the Fig.8's strength (so, for a 70% knot it's 7% pt.s).
But by one testing (Lyon Equip 2001) the Fig.10 loopknot is stronger yet,
so why is the OP interested in the Fig.9 at all? (And, to borrow from Dave
Barry, we can then convene a research committee to figure out what
comes after "10". :o)
If your knot strength matters to the last 10% you need a bigger rope.
Of course it never does, does it? --show us the history of failures from
use of the inferior knots! --or the brazenness of a user to load a rope
to its expected near-maximum.
The biggest 'problem' with the F9 is that it's only good as an end loop knot.
--------
I have used the figure nine on a bight as an endline loop and as a midline loop when it won't be weighted so that it will capsize ...
I don't see this: if anything, the offset loading of these knots favors the
Fig.9 for stability; the Fig.8 has a bad reputation from a presumed tragic
failing as an offset bend for abseil ropes and in testing as such. Indeed,
it's my belief that making a full turn before tucking out the end of the
*outer* of the twin ends of the infamous EDK (Offset Overhand Bend),
which effectively makes a Fig.9 in that line, gives stability to that bend.
The directional F9 and the 'Bunny-9' do exist, but both are significantly weaker than the equivalent in the F8 family
I find it hard to believe that a Directional Fig.9 is weaker than a the DF8
qua loopknot; pulled end-to-end, the DF8 is essentially a Square knot,
and the DF9 a more imbalanced structure. But there is a good deal
to consider re the orientation/dressing of such knots. Frankly, I'd think
that the Directional Fig.10 would work best--having a better through
loading structure, and being easier to untie. --dressing options . . .
An overhand is pretty much 50% at any speed ...
Interesting: in that Lyon found higher figures (6x%), and Adam Fox got
results equivalent to the Fig.8 (loopknots), which he said agreed with
other testing he was aware of! And, again, again, again&again ..., but
for Lyon's tests, we're left to wonder how the knot was dressed & loaded.
(In Lyon's case, I must wonder at how they were set--not as I would do,
I surmise.)
*knudeNoggin*
- knudeNoggin
- Prolific Poster
- Posts: 190
- Joined: Mar 4, 2006 4:48 pm
- Location: Falls Church, Virginia, USA
![]() by ek » Apr 15, 2007 1:12 pm
by ek » Apr 15, 2007 1:12 pm
knudeNoggin wrote:But by one testing (Lyon Equip 2001) the Fig.10 loopknot is stronger yet, so why is the OP interested in the Fig.9 at all?
Because one test is hardly conclusive? Because the "Figure 10" is extremely difficult to set well (so that the first loop around is pulled in)?
knudeNoggin wrote:I have used the figure nine on a bight as an endline loop and as a midline loop when it won't be weighted so that it will capsize ...
I don't see this: if anything, the offset loading of these knots favors the
Fig.9 for stability; the Fig.8 has a bad reputation from a presumed tragic
failing as an offset bend for abseil ropes and in testing as such.
Several tragic failings of the Figure 8 when used this way, if I remember correctly. I wouldn't tie and overhand or a Figure 8 either when it would be loaded flat. (I would tie a retraced Figure 8 or Figure 9 around an object, so long as I was only pulling from the tail--this way, the knot would be kept set by the tail pulling out with greater force than the flat loading, and the knot would not capsize. I would not tie around an object with a flat overhand/Figure 8/Figure 9 bend and then clip into the loop.)
knudeNoggin wrote:Indeed,
it's my belief that making a full turn before tucking out the end of the
*outer* of the twin ends of the infamous EDK (Offset Overhand Bend),
which effectively makes a Fig.9 in that line, gives stability to that bend.
I don't think I understand what you're saying here. If you're saying that you think the Figure 9 flat bend is safer than the overhand flat bend, then I'm pretty sure you're mistaken. I can easily get an unset (loosely tied) Figure 8 or Figure 9 on a bight to capsize when I pull on the ends coming in, whereas it is much harder with the overhand on a bight. I think the overhand flat bend is the safest of the dangerous flat bends in that family because it is smallest--there is less room for capsizing. If you're saying something else, I apologize, but I don't know what it is.
knudeNoggin wrote:The directional F9 and the 'Bunny-9' do exist, but both are significantly weaker than the equivalent in the F8 family
I find it hard to believe that a Directional Fig.9 is weaker than a the DF8
qua loopknot;
LifeOnALine: Can you provide us with the tests that the double Figure 9 and directional Figure 9 are weaker than the double Figure 8 and directional Figure 8?
knudeNoggin wrote:pulled end-to-end, the DF8 is essentially a Square knot,
I don't see this. (And the notion seems strange to me, as for instance, the directional Figure 8 pulled end-to-end jams, but the square knot doesn't.) Can you explain? Also, if this is the case, does it matter? As far as I know, the only problem with the square knot is that it slips--not that the rope breaks at too low a tension.
knudeNoggin wrote:and the DF9 a more imbalanced structure. But there is a good deal
to consider re the orientation/dressing of such knots. Frankly, I'd think
that the Directional Fig.10 would work best--having a better through
loading structure, and being easier to untie. --dressing options . . .
What does "imbalanced structure" mean? How does the "Figure 10" have a better "through loading structure"?
NSS 57892
Syracuse University Outing Club
Fund vital White Nose Syndrome research--donate to the NSS and select the WNS Rapid Response Fund.
Facebook users can also donate here.
-
ek - NSS Hall Of Fame Poster
- Posts: 1040
- Joined: Apr 3, 2007 2:45 am
- Location: Syracuse, NY
- Name: Eliah Kagan
- NSS #: 57892
- Primary Grotto Affiliation: Syracuse University Outing Club
Re: Figure 9
![]() by fuzzy-hair-man » Apr 15, 2007 10:40 pm
by fuzzy-hair-man » Apr 15, 2007 10:40 pm
WildWolf wrote:Since the Figure 9 knot is more efficient then why do most of us use a Figure 8 knot?
I have wondered the same thing and mostly got the answer "nines are complicated and use more rope and the increase in strength doesn't warrant thier use", it's an argument I don't really find compelling though so I'm not going to change back to using 8s.
Well, here we generally see more figure 9s than 8s (we use both):
Here is what we typically use and some of the reason's why there may be others:
Rethreaded Figure 8: rethreaded or backtied ie around a figure 8, rope around a column and then rethreaded to form a loop. Difficult to do with a nine and by definition these are rarely if ever going to be abnormally loaded.
Figure 8 end loop knot: An end loop knot where the knot is not expected to be abnormally loaded.
Figure 9 (used almost exclusively as a loop knot): Rebelays where failure of the rebelay could see the knot abnormally loaded. It is my understanding that a figure 9 is stronger than a figure 8 or Alpine butterfly when abnormally loaded. There is also the possibility that the rope is rubbed in the loop (eye) of the knot if this wears through the rebelay will fail and the knot is abnormally loaded. If the knot is suseptable to 'rolling off the end' as a figure 8 has I believe, been known to do then there is the possibility of the two pieces of rope parting company. As the anchor is in rock (bolt) rubbing through the eye is not an impossible situation, unlikely perhaps but not impossible.
Double fisherman's: Rope joins with a figure 8 or figure 9 in the lower tail to provide a clip in point.
Regarding the point about being able to recognise a figure 9, I think if you see enough of them you will be able to recognise them so if they are commonly used recognising and verifying they are tied correctly will not be a problem.
Regarding using too much rope, unless your pitch lengths are really close to the rope you have I doubt it will make much difference, if it is really that close you may be able to gain more rope safely from other parts of your rigging.
Regarding being able to undo figure 9s I haven't had a nine I couldn't undo (touch wood) so they seem pretty reasonable. But our use of figure 8s are generally on the backup anchors so they rarely get fully loaded so they are easy to untie as well so there is no basis for comparison there.
-

fuzzy-hair-man - NSS Hall Of Fame Poster
- Posts: 955
- Joined: Apr 6, 2006 2:09 am
- Location: Canberra, Australia
- Primary Grotto Affiliation: NUCC
![]() by knudeNoggin » Apr 16, 2007 1:26 am
by knudeNoggin » Apr 16, 2007 1:26 am
it to the Fig.10, I don't buy the difficulty rationale--more likely one
of familiarity/possibility, even. With more wraps (each number being
a half-wrap more than its predecessor), one has more dressing options
or variance, but the 10's not any giant leap from the 9.
But before missing this opportunity, it needs to be first asked
Why not dress & set the Fig. 8 like this? ! The variations seen
in the knots denoted by the name seem pretty substantial, IMHO; until
there's some good testing on this (Lyon weakly tried), I'm not willing
to dismiss it as all a wash. And one orientation might be about as much
a difference from another as particular named knots are.
And keep in mind the frequency of rope failures from weak knots (none).
I wouldn't tie an overhand or a Figure 8 either when it would be loaded flat. (I would tie a retraced Figure 8 or Figure 9 around an object, so long as I was only pulling from the tail--this way, the knot would be kept set by the tail pulling out with greater force than the flat loading, and the knot would not capsize. I would not tie around an object with a flat overhand/Figure 8/Figure 9 bend and then clip into the loop.)
I'd like to flatten "flat" in preference for the apt "offset"--what the
knots are when so-called "abnormally" loaded (which is rather normal
in the case off the Offset Overhand Bend for abseil-rope joining).
knudeNoggin wrote:Indeed,
it's my belief that making a full turn before tucking out the end of the
*outer* of the twin ends of the infamous EDK (Offset Overhand Bend),
which effectively makes a Fig.9 in that line, gives stability to that bend.
I don't think I understand what you're saying here. If you're saying that you think the Figure 9 [offset] bend is safer than the offset overhand [] bend, then I'm pretty sure you're mistaken. I can easily get an unset (loosely tied) Figure 8 or Figure 9 on a bight to capsize when I pull on the ends coming in, whereas it is much harder with the overhand on a bight. I think the overhand flat bend is the safest of the dangerous {offset} bends in that family because it is smallest--there is less room for capsizing.
Well, your response touches on a knotting dilemma of sorts: what level
of competence (or, possibly, range of materials) must/should one
anticipate in recommending some set of knots? E.g., if one must try
to guard against a knot being loosely/inadequately set (or in some quite
intractable material--i.p., PMI No-Flex(tm) :o), a knot with better "on
average" performance might be the better choice. But with a bit of old
No-Flex now in an Offset Fig.9 and loaded a bit via pulley, it doesn't look
all so bad. There's an old test report on-line under rec.climbing in which
the Offset Fig.9 was tested, but I'm unaware of any other testing of it.
If one is only interested in the bend (not mid-line loopknots),
then the Offset 9-Oh & even 8-Oh look good, as well as the OOB with
the choking rope's end tied off around the other end with an Overhand
stopper. The point with the 9-Oh is that the 9 makes a [i]full wrap[i]
at the choke point, and this cannot be pried open like the lesser wraps
of the 8 & Overhand. (And the use of a full Offset Fig.9 diminishes this
aspect slightly by having the twin rope trace this turn--which opens
the helix angle of the turn by one rope diameter. Only the outermost
strand need make the binding at the entry point.)
I concur in your general observation that to some extent the extra
material in the larger knots is fodder for expansion & capsizing; but it's
also a matter of how that material is used. Try making the OOB but
take the 1st-choking-at-entry strand and go a half wrap more, which
will have its end tucking out in the opposite direction from that for the
Overhand--making an 8. That (call it "Offset 8-Oh bend") knot seems
pretty stable.
knudeNoggin wrote:The directional F9 ...
Which got me thinking about the symmetric F9 and ... , but one cannot
tie this without ends. (If one can use the ends, there are bi-directional
F8 & F9 loopknots. That of the F9 is non-jamming.)
If one doesn't mind a rather massive knot, there are twin-eye mid-line
loopknots corresponding to some Butterfly-like bends from Ashley (his
numbers #1408 & #1425 (aka "Ashley's Bend")). The "twin" eyes are
a necessity for symmetry, and by loading them as such (i.e., as though
a single eye), the knot is kept from the jamming a Butterfly can do.
knudeNoggin wrote:pulled end-to-end, the DF8 is essentially a Square knot,
I don't see this. (And the notion seems strange to me, as for instance, the directional Figure 8 pulled end-to-end jams, but the square knot doesn't.) Can you explain? Also, if this is the case, does it matter? As far as I know, the only problem with the square knot is that it slips--not that the rope breaks at too low a tension.
The eye-side end enters the knot, w/dosado around the opposite and
a u-turn into being one leg of the eye; the opposite end reciprocates but
after the 2nd twist of the opp.end makes a wrap around itself to turn
back as the other leg of the eye. So, "square" at the point of greatest
force, though the eye-side u-turn has an extra rope diameter in it, and
the other would-be Square-knot end makes a wrap & further tuck back.
Squares can jam; incredible as it seems, I found in some fisherman
quarter-inch line a Square LOOPknot!! --which had to be damn tight
to keep that integrity for some load.
Btw, in the CMC Rope Rescue Manual (3rd ed.), the Directional Fig.8 LK
test results are the worst a trio comprising it, the Butterfly, and the OFFSET
Fig.8!! "Rope With A Loop In It [pulled end-to-end]" Their respective
results are: 65%, 59%, & 69%. One can wonder about exact geometries.
What does "imbalanced structure" mean? How does the "Figure 10" have a better "through loading structure"?
With the Directional-9 (though I might wonder if there's an image for this
to check our apples & oranges!), you don't have that "dosado" twisting
of the opposed ends. And with the D-10, this twist is more extended than
in the D-8; the D-10 just looks nicer, to me.
*knudeNoggin*
- knudeNoggin
- Prolific Poster
- Posts: 190
- Joined: Mar 4, 2006 4:48 pm
- Location: Falls Church, Virginia, USA
![]() by LifeOnALine » Apr 17, 2007 1:36 pm
by LifeOnALine » Apr 17, 2007 1:36 pm
Looking through my program of tensile testing on 11mm nylon low-stretch ropes (Marlow Pro-Static EN1891) of varying ages and levels of wear, the DF9 results came out as follows:-
Test setup used a DF9 tied in the center of a 2m sample, attached to the test machine at the free end with a tensionless binding. The average MBS of the rope without any knots was 35kN (+- 3) which confirms Marlow's own spec of 36kN.
With the LOOP of the DF9 loaded (so the other end of the sample rope was hanging free), 13 out of 15 samples failed at the knot, with a breaking load of 20.5kN (+- 3.5) - so roughly 58%. On one case the knot slipped completely and the free end of the rope untied itself, slipping at 18.5kN peak. The last case was going to do the same but we ran out of length on the test machine before the knot fell apart.
Leaving the loop unattached and loading the sample rope end-to-end, the results are far worse. Prior to loading, the DF9 was dressed and tightened by applying a 100kg load to the loop for a few seconds. In 8 out of 15 runs, the entire knot slipped through itself and untied, average slip force was 9kN to 13kN. In the remainder the DF9 knot failed at the exit point of the directional rope (the end under tension). Average breaking load was 12.5kN (+- 4.8kN), therefore a through-knot strength of only 36%. Slip through the knot before failure was between 10cm and 30cm.
(as a comparison the through-rope strength for a directional Figure-8 tends to be about the 60-70% strength range expected from all Figure-8 knots. We haven't got enough data on the DF10 to confirm figures but a few tests this afternoon showed it behaves similar to the DF9, with a very low through-load strength and a likening for untying itself...)
~DM~
-
LifeOnALine - Occasional Poster
- Posts: 30
- Joined: Mar 4, 2007 6:55 pm
Who is online
Users browsing this forum: No registered users
 Cavechat is the official caving forum of the National Speleological Society.
The NSS is not responsible for the opinions expressed, and cannot verify the accuracy of information presented.