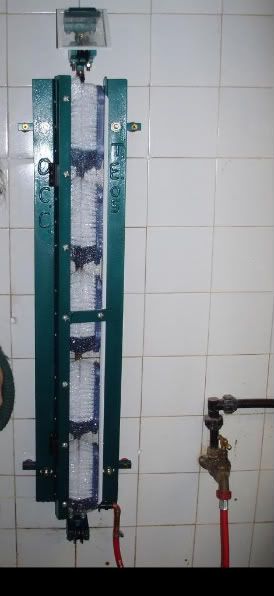
I overheard some folks saying that the rescue team should buy some Bokat rope cleaners to save time. Intrigued, I found them online for around $30 to $40. It's an ingenious little device really, but I'm cheap and I thought I could make one on my own. I searched the internet some more and found the following how-to:
http://www.knick-knack.com/howto/climb/build-a-climbing-rope-washer.html
It was helpful, but it still lacked the bristle element that the Bokat has, which I really think would make a difference. So I took a trip down to my local Ace hardware and constructed one of my own.
I got all of my parts for around $22, and I think if I had ordered them from a plumbing specialty store or even Home Depot I think I could have saved about $10, but Ace is so much closer and it would have cost me more than $10 in gas to get there!
Here's the list:
2 X 1 and 1/2 inch to 3/4 inch PVC threaded adapters
1 X 1 inch to 3/4 inch PVC threaded bushing
2X 1 and 1/2 inch PVC to 1 and 1/2 inch threaded bushings
1X 1 and 1/2 inch to 1 inch tee
1X Garden hose male to female coupler
PVC cement (which I had on hand)
1X tacky astroturf door mat
Here's a picture of all the elements laid out:

I first started out by gluing the adapter to one end of the tee. You'll notice I didn't use PVC primer; it's unnecessary for pipe that is less than 4 inches in diameter. When you push the pieces together make sure and push down and twist at the same time. This will ensure that the pieces form a good bond.

The two pieces should form a tight bond in a matter of minutes, though it will take around 2 hours to completely cure.

I next cut a section out of the AstroTurf door mat. The strip was maybe three inches long.

I curled the strip into a semi circle and pushed it into the end where I had glued the bushing in. You'll notice I didn't cut a piece long enough to go the entire circumference of the pipe. More on that later.

I then glued the 1 inch to 3/4 inch bushing to the top of the tee. I also put some teflon tape on the male end of the brass garden hose adapter. I did this because the garden hose adapter threading was much coarser than the threading on the PVC, which led me to believe the water might leak in the top. You'll notice that the adapter has a hard time going into the PVC. This is because you're basically cross-threading the PVC adapter, which is ok because the brass adapter is permanent, and along with the teflon tape it should eliminate any leaking.


Next I cut another strip of the Astro Turf into another 3 inch strip and inserted it into the remaining adapter. I found the turf blades were too long so I trimmed them down a bit. I rotated the Astro Turf so that it was oriented opposite of the first piece. I also did not glue the last adapter. I did this for a few reasons. First so that if the Astro Turf lost it's position I could rearrange it as I saw fit. Secondly if the Astro Turf ever lost its rigidity I could replace them as needed (I still have that huge door mat to use!). Thirdly, I think that initially loading the rope before cleaning it will be easier if I can remove the bushing.
Here's the final product:

Some final thoughts. Make sure that you allow an adequate time for the PVC cement to cure. The fumes on that stuff are vicious, and I'm certain that wet PVC cement would not be very friendly to ropes. (PVC cement essentially melts the two surfaces of the PVC together, ensuring a permanent bond.) In hindsight, I should have gotten a a 1 and 1/2 to 1/2 inch reducer instead of a 1 and 1/2 to 3/4 inch reducer. I think the threading on the 1/2 inch would have aided in cleaning the bigger chunks of nasty off the rope, but fortunately since both ends are threaded, I can always do that in the future.
Thanks for reading, and if I can answer any questions, please feel free.
If anyone is interested, I wouldn't mind making them one of these things if they paid me for the parts. It only took me about 20 minutes to put it together... pretty easy, really.
bo


 Although... personally I find a pressure washer much more convenient for cleaning rope and most other caving gear. Especially the NCRC gear cache. Rope brushes may arguably be a little quicker, but they usually take more than one person to operate and don't get the rope quite as clean as a pressure washer. I don't think I could ever go back to the old traditional labor-intensive rope scrubber unless there was really no other option.